Get easy access to different icons for your web projects using a free tool like Font Awesome.
Font Awesome is a vast library of icons that you can integrate into your projects in a matter of minutes.
It provides an assortment of free, open-source icons across various categories so it’s highly likely you’ll find what you’re looking for!
If you’ve ever wondered how to get a sleek magnifying glass for your search input or all those social media icons then Font Awesome is just the thing you need.
We’ve previously used Font Awesome in the How To Build An Eye-Catching Personal Portfolio Webpage post to add social media icons.
In this post, I’ll show you the exact steps to embed the Font Awesome toolkit in your own application.
See the Pen Add Font Awesome Icons by Klea Merkuri (@thehelpfultipper) on CodePen.
We’ll be embedding Font Awesome in:
- a local HTML file (i.e. you run it from your Desktop)
- a Codepen project
1. Creating a demo project file (optional)
I’ll begin by creating a sample HTML file with some code to display the icons once I integrate Font Awesome.
If you have an ongoing project, feel free to skip this step and proceed with the Font Awesome integration below.
Otherwise, follow along to create a simple grid that will display a selection of Font Awesome icons.
Display the icons in a 3×3 grid
Our HTML page will display the Font Awesome icons in a 3×3 grid since I’ll use nine icons for this demo.
The page layout consists of:
- a page heading
- grid of 3 rows and 3 columns
- a card in each grid cell
Each card consists of:
- Font Awesome icon
- name of the icon
Your code shouldn’t consist of card items at this time – each card will be empty.
<h1>Font Awesome Icons in HTML File</h1>

<div class="grid">
  <div class="card">

  </div>
  <div class="card">

  </div>
  <div class="card">

  </div>
  <div class="card">

  </div>
  <div class="card">

  </div>
  <div class="card">

  </div>
  <div class="card">

  </div>
  <div class="card">

  </div>
  <div class="card">

  </div>
</div>
To create the grid, I use CSS grid.
body {
    background-color: pink;
    text-align: center;
    font-family: sans-serif;
}

h1 {
    display: inline-block;
    background-color: yellow;
    padding: 2rem 4rem;

}

.grid {
  width: 100%;
  max-width: 800px;
  display: grid;
  grid-template-columns: repeat(auto-fit, minmax(200px, 200px));
  grid-template-rows: auto;
  justify-items: center;
  justify-content: center;
  gap: 2rem;
  margin: 5em auto;
}

.card {
  width: 100%;
  max-width: 200px;
  height: 200px;
  background: white;
  box-shadow: 0 0 2px grey;
  border: 1px solid #41403E;
}

h1, .card {
  border-top-left-radius: 255px 15px;
  border-top-right-radius: 15px 225px;
  border-bottom-right-radius: 225px 15px;
  border-bottom-left-radius:15px 255px;
  border:solid 2px #41403E;
}
This is what we have so far:
Tip: To create the illusion of sketched borders for the heading and cards, use a combo of various border-radius measures.
2. Get started with Font Awesome
Head over to the Font Awesome start page for set up.
You’ll need an email to get the “start kit” which provides the code you need to embed in your projects.

Once you enter your email, you’ll be asked to confirm it. So go to your email and click on “Confirm Your Email Access“.
Next, you’re redirected to a page where you can set up a password for your Font Awesome account.
A screen prompting you to share a bit about yourself pops up – it’s optional. If you scroll at the very bottom, there is an option to skip the step.

And you’re in! A page will appear with an alpha-numeric name that belongs to you.
The page lists out instructions and, most importantly, provides the kit code you need to copy. It’s the entire <script ...> ... </script> line.

That’s all you need.
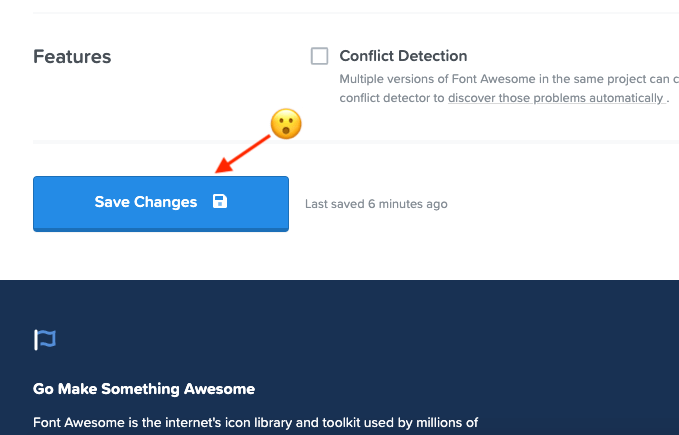
However, if you want to customize a bit, click on the “Settings” tab to change the name of the kit along with any of the other available settings.

Whatever change you opt for, don’t forget to click on “Save Changes” at the bottom of the page!
3. Add Font Awesome to your project
Make sure to copy the kit code. It will go in the <head> ... </head> section of your HTML page.
For local files, this is rather obvious as you clearly have a labeled <head> section.
Should you not have one, then I highly encourage you to go over the structure of an HTML document ’cause, yikes man, you need help.
Anyways, local file – obvious. Codepen, not so much.
Codepen embed instructions
If you use Codepen for building your projects, you’re probably aware the HTML pen doesn’t take on the <head> section.
You typically only include what goes in the <body> of your file.
For anyone who wasn’t aware of that, you’re welcome.
So, where do you put the Font Awesome kit code when working on Codepen?
It still goes in the <head> section, but you have to go through the HTML pen’s settings accessed using the gear icon.

When clicking on the gear, an overlay pop-up will display the settings box labeled “Pen Settings“.
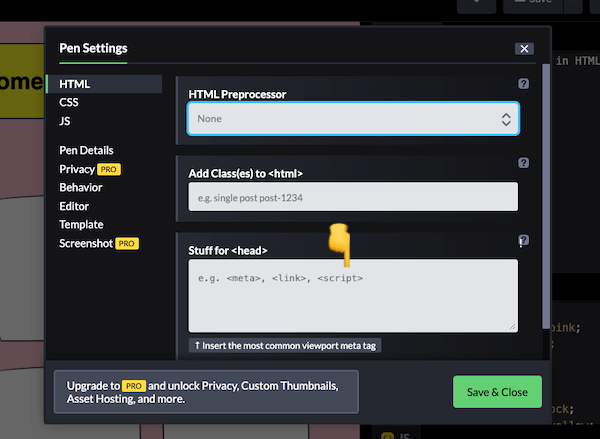
In the “Stuff for <head>” textarea, paste the kit code you copied earlier.
Hit the “Save & Close” button and you’re good to go.
4. How to use Font Awesome icons
I find that Font Awesome has easily digestible documentation of how to use their syntax.
They even contain custom classes to add neat animations and styles to the icons without having to write any additional CSS or JavaScript.
But let’s start with choosing a few icons to display on our demo page.
Going to the icons library browse for whatever your heart desires (to an extent, roll with it).
You have the option to search for a particular icon you’ve in mind or browse by category or, even, style (e.g. solid, thin, regular, etc.).
I’ll search by the keyword “animals”.
Clicking on one of the animals brings up a pop-up overlay with a variety of settings. Here you can find:
- available styles (on the very top bar)
- unicode, glyph, or svg alternatives
- a code snippet
Feel free to explore the settings though, for our purposes, I’ll copy the HTML code snippet and paste it on the first card of my demo page.
Tip: Not all icons are free!
In the example above, the icon is labeled as a “Pro Icon” – it won’t be available unless you pay.
To get free icons, use the “Free” filter on the left sidepanel.
The code for each card follows this general format:
<!--
This is a comment block:

  <div class="card"> <= Card
    <i class="fa-solid fa-otter"></i> <= Copied icon code snippet
    <p>Otter</p> <= Name of icon
  </div>

-->
This is how each card now looks:
Since the icons are far too small, I’m going to resize them using the built-in Font Awesome sizing styles, fa-6x.
To vertically center the card items give the card class a flex display.
display: flex;
flex-direction: column;
justify-content: center;
And make the icon names bold:
.card p {
  letter-spacing: .05em;
  font-weight: 600;
}
Lastly, I added a little interactivity to each of the icons using transform and transition.
i {
  transition: transform .2s ease;
}

i:hover {
  cursor: pointer;
  transform: translateY(-10%);
}
That’s it, we’re done!
You’ve successfully added Font Awesome icons to your project and learned how to use built-in classes for styling.
What more can you ask for in life?
Jk, see ya on the next adventure.


