
How can you access HTML elements with JavaScript? You use the DOM or Document Object Model which gives you access to the HTML document by way of the document object.
Think of the document object as your HTML document. To get different HTML elements, you can call certain built-in methods of the document object whose purpose is to do the retrieval.
All HTML elements are stored in the document, so every time we grab an HTML element from the DOM we start with document followed by the method.
In this post, we’ll go over the different methods you can use to grab HTML elements from the DOM. First, we go over pre-ES6 JavaScript syntax before moving on to the newer ES6 methods. We end with a neat project that puts all we learn into practice.
ES6 is an updated version of JavaScript syntax that builds on standard JavaScript. Both standard and ES6 JavaScript are supported so you can use whichever you want.
Find more on ES6 JavaScript here.
Standard JavaScript Methods
Standard JavaScript methods for fetching elements from the DOM include getElementById(), getElementsByTagName(), and getElementsByClassName().
1) Get an element by its id
getElementById(“…”)
We use the HTML id attribute to refer to specific elements. Since an id is unique – it shouldn’t appear for more than one element – selecting an HTML element with a specific id guarantees pointing to that element.
Example: Get the <p> tag by its id and change its content to something else with JavaScript.
Hint: To change the inner content, set a new value for the innerHTML property.
<p id="text">Hello World!</p>

<script type="text/javascript">

    document.getElementById("text").innerHTML = "Hello THT!";

</script>
Quick JavaScript Breakdown
- document
Points at the DOM, telling the browser to look within our HTML document.
- . (dot/fullstop/period following
document)
Tells the browser to go in the document object.
- getElementById(“text”)
Gets the element with an id of “text” from the document.
- innerHTML = “Hello THT!”
Specifies how we want to change the selected element – in this case, changing its content.
In the above example, we told the browser to go within this document, get the element with the id of text and change the content of that element.
Note: Spelling
Start with lower-case and every word after is designated by a capital first letter. This is otherwise known as camel casing. JavaScript is case-sensitive so getting the spelling right is important to avoid errors.
>> Tip <<
Let’s say we wanted to do other things to the <p> tag above. Instead of grabbing the element from DOM each time, we could grab it once and store it in a variable for repeated use.
Create a variable (you can call it whatever you want) and set it equal to the retrieved p element.
const greeting = document.getElementById("text");Now change its content like so:
greeting.innerHTML = "Hello THT!"2) Get an HTML element by its class
document.getElementsByClassName(“…”)
Notice “Elements” is plural unlike with getElementById where its singular.
Getting elements by class name returns a list of all elements in the document with the specified class. Since class isn’t a unique identifier like id – there can be more than one element with the same class – the return response is a list.
It’s important to understand this because doing anything to the elements retrieved this way requires to loop through the list to either (1) pull the element we want to affect or (2) affect all elements.
Challenge: Get the elements with a class of “demo” and turn the first element’s content to upper case so it reads “I’M THE FIRST ELEMENT WITH A CLASS OF DEMO”.
<p class="demo">I'm the FIRST element with a class of demo.</p>
<p class="demo">I'm the SECOND element with a class of demo.</p>
<p class="demo">I'm the THIRD element with a class of demo.</p>
<p class="demo">I'm the FOURTH element with a class of demo.</p>
Steps to follow:
- Store the list retrieved with getElementsByClassName() in a variable.
- Get the first item in that list (hint: it has an index of zero).
- Take the first item’s content and turn it to upper case using the built-in JavaScript method toUpperCase().
<script type="text/javascript">

    const demoList = document.getElementsByClassName("demo");

    demoList[0].innerHTML = demoList[0].innerHTML.toUpperCase();

</script>
Tip: Store
demoList[0].innerHTMLin a variable to make re-using easier.

3) Get an HTML element by its tag
getElementsByTagName(“…”)
Like getElementsByClassName() returns a list of all elements of a particular class, getElementsByTagName() returns a list of all elements of a specific tag.
When we say “tags”, we’re talking about HTML tags like p, div, li, ul, and so forth.
In the previous example, we can easily get the p tags by their tag name instead of searching using class name.
<script type="text/javascript">

    const demoList = document.getElementsByTagName("p");

    demoList[0].innerHTML = demoList[0].innerHTML.toUpperCase();

</script>
Summary
- getElementById(“…”) returns a single item.
- getElementsByClassName(“…”) and getElementsByTagName(“…”) each return a list.
ES6 JavaScript Methods
The newer syntax allows us to grab either a single element or all instances of an element by way of two relatively flexible methods.
Both methods make use of CSS selectors to identify the element(s) to grab. This means when selecting an element by its id, you’ll search for “#myID” because that’s how you reference the element in CSS. Likewise, if searching by class, it would be “.myClass”, or by tag, “p”.
1) Select a single element
querySelector(“…”)
This will return a single element – if more occur in the document, it will return the first instance only.
In the example above, we can get the first p element either by tag name or class name using a single method.
Challenge: Turn the first paragraph to upper case and give it a background color by selecting the first <p> in two different ways.
- Get the content by tag name using querySelector() and turn them into upper case.
- Get the content by class name using querySelector() and set a background color of yellow.
<script type="text/javascript">

    const byTag = document.querySelector("p");
    byTag.innerHTML = byTag.innerHTML.toUpperCase();

    const byClass = document.querySelector(".demo");
    byClass.style.backgroundColor = 'yellow';

</script>
There’s redundancy in the example as we’re selecting the same element in different ways, but it drives home the point, no?
2) Select all instances of an element
querySelectorAll(“…”)
Adding “All” to the previous method gives you access to a different method that returns a list of all element occurrences.
Similarly to querySelector(), querySelectorAll() looks for elements using CSS selectors. Again, this means to reference a class you’ll need the fullstop in front (.myClass); for an id, the hash (#myID) and for, let’s say an attribute selection, it’ll be something like a[href=’mylink’].
Get familiar with CSS selectors by reading Common CSS Selectors To Know And How To Use Them.
Coding Challenge: Click the Button
Put what you’ve learned about JavaScript selection methods to the test!
The Objective: To create a window with three buttons. Each button comes with a number representing the order a user is to click it.
- first button: changes the background color of the window
- second button: changes the text of the window
- third button: prompts entry of user’s name and adds it to the text
Once the user clicks on a button, that button disappears. In the end, you have an entirely new window with a single reset button that, when clicked, returns the initial screen.
See the Pen Click the Button (Code Challenge) by Klea Merkuri (@thehelpfultipper) on CodePen.
Give this a try on your own or follow along as we’ll guide you step by step.
1) Add HTML components
Start by styling the body, giving it a background color, then add the text and three buttons.
body {

    padding: 0;
    margin: 0;
    background-color: #333333;
    font-family: -apple-system, BlinkMacSystemFont, 'Segoe UI', Roboto, Oxygen, Ubuntu, Cantarell, 'Open Sans', 'Helvetica Neue', sans-serif;
    color: white;

}
<div id="main">
<h1>Are you ready?</h1>
<h3>Follow the buttons in numerical order.</h3>
<button id="b1">1. Style</button>
<button id="b2">2. Text</button>
<button id="b3">3. Special</button>
</div>2) Center the elements
To display everything in the middle of the screen, give #main a width and set its margin to auto. Then align the elements inside of #main in the center and style the text.
#main {

    width: 600px;
    margin: 150px auto;
    text-align: center;

}

h1 {

    font-size: 400%;

}

h3 {

    font-weight: 200;
    margin-bottom: 50px;

}

h1, h3 {

    letter-spacing: 0.08em;

}
This is what you should have so far:

3) Style the buttons
Time to get our buttons in tip-top shape and it all starts by getting rid of the default button styles.
button {

    border: 1.5px solid white;
    background: transparent;
    font-size: 140%;
    padding: 10px 16px;
    margin-right: 15px;
    color: white;
    font-weight: 300;

}

#b3 {

    margin: none;

}
Note: We give the last button no margins to undo the right margin we add to all buttons. There is a better way to set margins here and that’s by using a pseudo CSS selector to select all buttons but the last one, :not(:last-of-type).

4) Set hover state of buttons
When the user hovers over a button, there should be some indication that it’s a clickable element. We’ll do this two ways:
- the cursor will change to a pointer
- the background color of the button will change to white and the text color to black
Hint: To set the hover state, use CSS pseudo selector :hover.
button:hover {

    cursor: pointer;
    background-color: white;
    color: black;

}
And to make the background color change on hover less jarring, let’s add transition: background-color 0.2s ease-in-out; to the button element.
We end-up with:
By this point, we’ve set the initial screen solely using HTML and CSS. To have the buttons do something, we’ll introduce JavaScript. Ready?
5) Store elements from the DOM in variables
Grab the buttons, text, and the body from the HTML document and set them in variables because we’ll need to point to them as we make changes with JavaScript.
Which method should you use to get the elements? That’s totally up to you – there’s no “right way”. You could do:
For buttons:
- Grab all three and reference by index using querySelectorAll(“button”) or getElementsByTagName(“button”).
- Grab one by one using their respective ids like so querySelector(“#b1”) or getElementById(“b1”).
For body and heading tags:
- Get by tag name – getElementsByTagName(“h1”) – keeping in mind you’ll need to reference using the index even though there is only one h1 in the list that the method returns. Even with a single item, it’s still a list.
- Get by way of querySelector(“h1”) – the best way here, if you ask THT (which you totally should btw).
We’ll do this for our code:
const styleBtn = document.getElementById("b1");
const textBtn = document.getElementsByTagName("button");
const specialBtn = document.querySelector("#b3");

const body = document.querySelector("body");
const h1 = document.querySelector("h1");
const h3 = document.querySelector("h3");
The way we’re getting buttons is totally extra, but it’s for demonstration purposes people – you’re welcome.
6) Change the body’s background color
When the user clicks on the first button two things need to happen:
- the body’s background color will change
- the first button will disappear from view
Here we’ll need to add an event listener to the first button that awaits the “click” in order to do those two things.
styleBtn.addEventListener('click', function() {

    body.style.backgroundColor = '#2C3E50';
    this.style.display = 'none';

});
The button that awaits the event is also the one that needs to disappear, so to reference itself we use the keyword this.
Note: You can’t use this in an arrow function (i.e. () => {…}) due to limitations.
7) Display new text
Clicking on the second button executes the following actions:
- changes the h1 content
- gets rid of the h3 – we don’t want it anymore
- the button disappears from view
textBtn[1].addEventListener('click', function() {

    h1.innerHTML = 'Hi there <span>______</span>!';
    h3.style.display = 'none';
    this.style.display = 'none';

});
We use textBtn[1] because we got the second button using getElementsByTagName(). And we added <span> around the underscored part since that portion will become populated once the user clicks on the last button.
Tip: To avoid removing the buttons from the flow of the page, so each button doesn’t move towards the middle due to center alignment, you can use visibility = “hidden” instead of setting display as none.
8) Prompt user for name & display it
Last, we want to display the user’s name in our new text. This requires we:
- prompt the user to enter a name and store it in a variable
- insert the variable with the name in the span tags to display
- make the last button disappear
To ask the user for a name input we’ll use the prompt() method and store the input in a variable that we inject in the span tag:
const userName = prompt("Enter a name: ");
document.querySelector('span').innerText = userName;
Note: For this to work at this point the user needs to have clicked on the first two buttons!
9) Reset button and errors
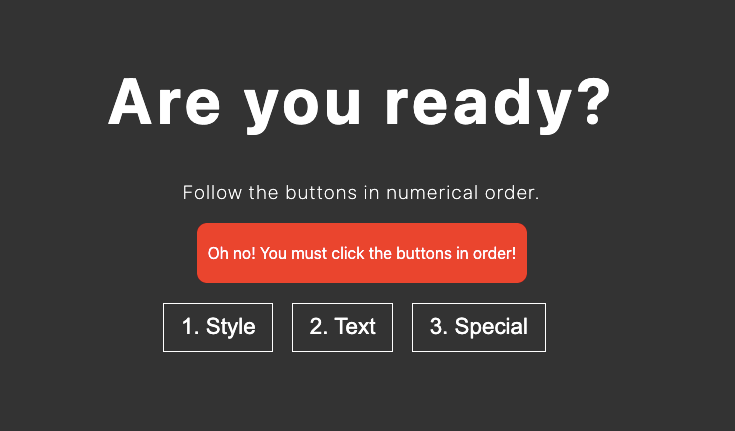
If you try to click the special button before having clicked either of the first two, you’ll get errors visible in the console.
To avoid errors we need to enforce the button order on the user’s behavior using some conditional logic.
First, add an error container in the HTML file right below the h3 that’s initially hidden from view. Give the error container some styles.
<div class="error">

    <p>Oh oh! You must click the buttons in order!</p>

</div>
.error {
box-sizing: border-box;
visibility: hidden;
margin: 20px auto;
background-color: rgb(232, 29, 29);
width: 55%;
border-radius: 10px;
padding: 5px 10px;
}
Second, add a fourth reset button and assign a ‘hide’ class to it. We will be toggling this class later on.
<button id="b4" class="hide">Reset</button>

.hide {

    display: none;

}
Get the hidden reset button and the error container from the HTML document and assign them to variables.
const resetBtn = document.querySelector("#b4");
const err = document.querySelector(".error");
Create two control variables that will allow checking if certain actions have taken place.
let error = false;
let isFirstClicked = false;
Control variables are boolean in nature (i.e. they’re either true or false) and are great when using conditional logic to check if something has happened.
We start off with error and isFirstClicked as false because there is no error when the script starts nor is the first button clicked.
When the user clicks the first button, isFirstClicked will become true.
isFirstClicked = true;
Then when the user clicks on the second button we’ll check to see if the first button is clicked before proceeding with the special button actions. Also check if error is true (which means the error message displays) – if not, hide the error message.
If the first button isn’t clicked, we’ll throw the error.
if(isFirstClicked === true) {

    !error && (err.style.visibility = 'hidden');

    // same special button actions as before

} else {

    !error && (err.style.visibility = 'visible');

}
Now, when the special button is clicked we’ll use a try…catch statement to throw an error. This error will arise when the user hasn’t clicked the second button because there will be no span tag in the document body.
Note: There are different ways to do this – we opted for this method as it remains relatively simple. For example, you can devise another control variable to account for a click of the second button.
try {

    document.querySelector('span').innerText = userName;

} catch (error) {

    err.style.visibility = 'visible';
    error = true;
    return

}
We update error to true because we check this variable when clicking the other two buttons and return kills the rest of the code so it doesn’t render.
Finish off the actions of the special button by making the reset button visible.
resetBtn.classList.remove('hide');
Lastly, execute the actions of the reset button on click:
resetBtn.addEventListener('click', function() {

    reset();
    isFirstClicked = false;

});
And in the reset() function, make sure to hide the reset button:
resetBtn.classList.add('hide');
We’re also ‘resetting’ the control variable isFirstClicked so we maintain the order of button clicks on consecutive rounds.
Awesome, you’re done! You can find the completed code on GitHub. Feel free to download the HTML and CSS if you want to only practice your JavaScript.
Any questions? Want to show your work? Leave a comment below!


