
HTML tables are somewhat controversial. Although great as a way to arrange and display information on a website, the grid structure of HTML tables was used to format webpages.
That is a big no – don’t do it. There are many reasons it is not good practice and you can find a list of them right here.
It’s safe to say there are better ways to format your webpage, without compromising accessibility or design, like Bootstrap’s grid system (which we will cover in future posts).
In this post, we will learn how to create HTML tables while understanding their general structure.
If you are unfamiliar with tabular data, an HTML table might look strange and, even, confusing. But don’t let it fool you – it’s actually really simple to understand!
What are HTML tables?
HTML tables allow us to neatly display information on a webpage by organizing data into rows and columns.
If you need help visualizing, think of an Excel spreadsheet. The division of space by use of columns and rows into cells is basically what you are creating when using HTML tables.
Columns are vertical and rows horizontal. You will see, however, that with HTML tables you only specify rows and the data in each row determines the number of columns.
What are HTML tables used for?
As we mentioned earlier, people used HTML tables to format the layout of web pages.
For example, to add a sidebar they would create a table with two columns – one for the main content and the other for the sidebar – but the reasons mentioned above make this problematic.
So use HTML tables only for displaying tabular data or if you want to:
- Highlight a pattern or trend
- Break down complicated data, making it easier for people to read
- Summarize important information
Rule of thumb: HTML tables are good for data not for layout.
How to create HTML tables
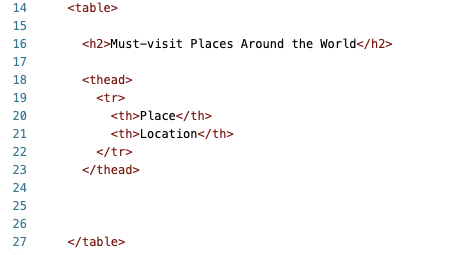
A schematic of HTML tables – a general structure – for a one-column table with two rows follows this form:
<table>

	<thead>
		<tr>
			<th></th>
		</tr>
	</thead>

	<tbody>
		<tr>
			<td></td>
		</tr>
	</tbody>

</table>
To create a table use the <table></table> element. On its own, it doesn’t amount to being more than a <div> like container. However, the magic happens once the child elements come into the picture.
Child elements of an HTML table
| Element | What it is |
|---|---|
| <thead></thead> | Table head |
| <tbody></tbody> | Table body |
| <tr></tr> | Table row |
| <th></th> | Table heading (designates columns) |
| <td></td> | Table data |
A <table> is divided into two parts: the table head, <thead>, and the table body, <tbody>. The head, <thead>, is where you specify your columns.
For a table with two columns, you want a <thead> that has a row with two table headings, <th>. The more <th> in a single row, the greater the number of columns in the table.

Moving onto the <tbody>, we can now enter our data. Again, we create a table row, <tr>, that takes all the data going under each column (table head) in table data tags, <td>.


The <td> element creates the Excel-like cells if you are still visualizing an Excel spreadsheet.
The order of your <td> is important because they need to align with the order of the <th> in the <thead>. Otherwise, your data will be misaligned as there’s no built-in association between headings and data. This is a concept that extends to relational databases so it’s good to spend a bit of time understanding it.
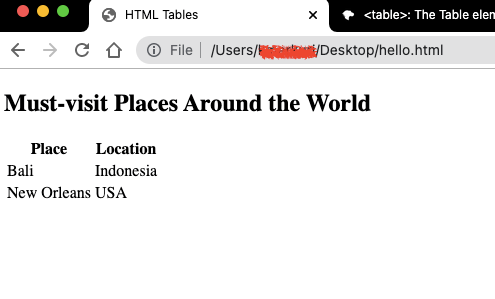
Let’s make our “Must-visit Places Around the World” table step-by-step.
- Set-up a table with two columns, one for Place and the other for Location.
- Insert the data with each row taking on first the place and then the location for that place.

Note: If you insert the location first and then the place, then under your Place table heading you will have the location data and under Location, you will have your place data. Your information will be reversed because order matters!
Add the rest of the data to complete the table – from here on it’s merely a game of data entry.


Summing things up…
An HTML table is made up of rows and columns. The table heading holds a row of all the columns while the table body takes on the data.
In the table body, the data is organized into rows with each row representing one object. For the example used above, each row in the table body represents a destination.
Each object has properties that make our table headings – our columns. So each destination is comprised of a place and a location. That means for each row holding a destination we will be entering two data points – a place and location – following the order we listed our table headings.
HTML Tables: The Extra Stuff
Our basic HTML table is complete, albeit without any styles or captions, notes, footers, and all the typical properties one would associate with an actual table.
For ideas on how you can personalize your HTML tables, visit this link which has clear information with examples.
We will end this post by mentioning only one styling aspect of a table because it might be something you are wondering about (might being the keyword here).
So what happens if you want subheadings?
Let’s say you want a table that lists names in two columns with the first name in one column and the last name in the second. We learned above how to get this far:


However, you also want to explicitly label the two columns as Name. Anyone familiar with Excel would know this as merging two columns – it’s essentially what we want to do here as well. And we can do so by using the colspan attribute (aka “column span”).
To get the merged heading all we did was add an additional row in our table head before the row holding our two column headings. This row contains one table heading – Name – with colspan="2".


Here the colspan property is 2 and it refers to the number of columns we want to merge; the default is 1.
Say you wanted to merge across four columns, then you would use a <th colspan="4">. A similar idea applies to merging rows except you will be using the rowspan attribute.
You can now present information in a neat and orderly way on your webpage! Look at you colspanning across HTML like a pro (pioneers always christen words).
What kind of HTML table did you create? We are awfully curious to know.


